

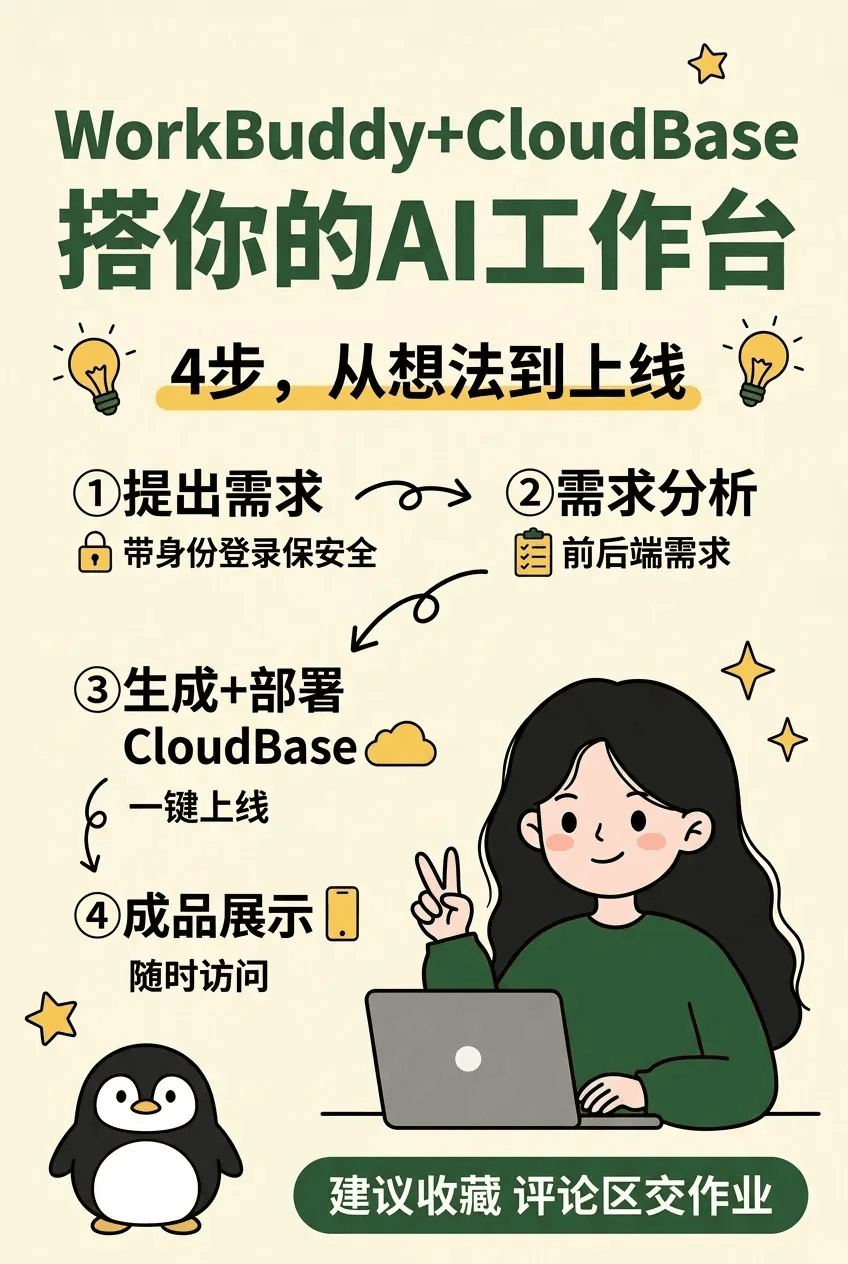
In this post: building a genuinely usable workbench on CloudBase from 0 to 1, then growing it to handle images and video, permissions and collaboration, shareable links, scheduled jobs, and payments. No code writing — everything runs inside WorkBuddy.
First, some context. Two waves of "homework submissions" recently made AI-built workbenches go viral: one started when a creator posted videos on Xiaohongshu teaching people to build personal workbenches with AI and showing off submissions, igniting a platform-wide trend. The other was WorkBuddy's AI workbench template contest, with a lively comment section.
Among the comments, alongside the "it finally runs!" wins, deeper questions started to surface: the page opens empty on another device, images won't sync, links sent to others can't be filled in, family members want to share it but each see only their own stuff.
These are all signals that the workbench wants to grow up.
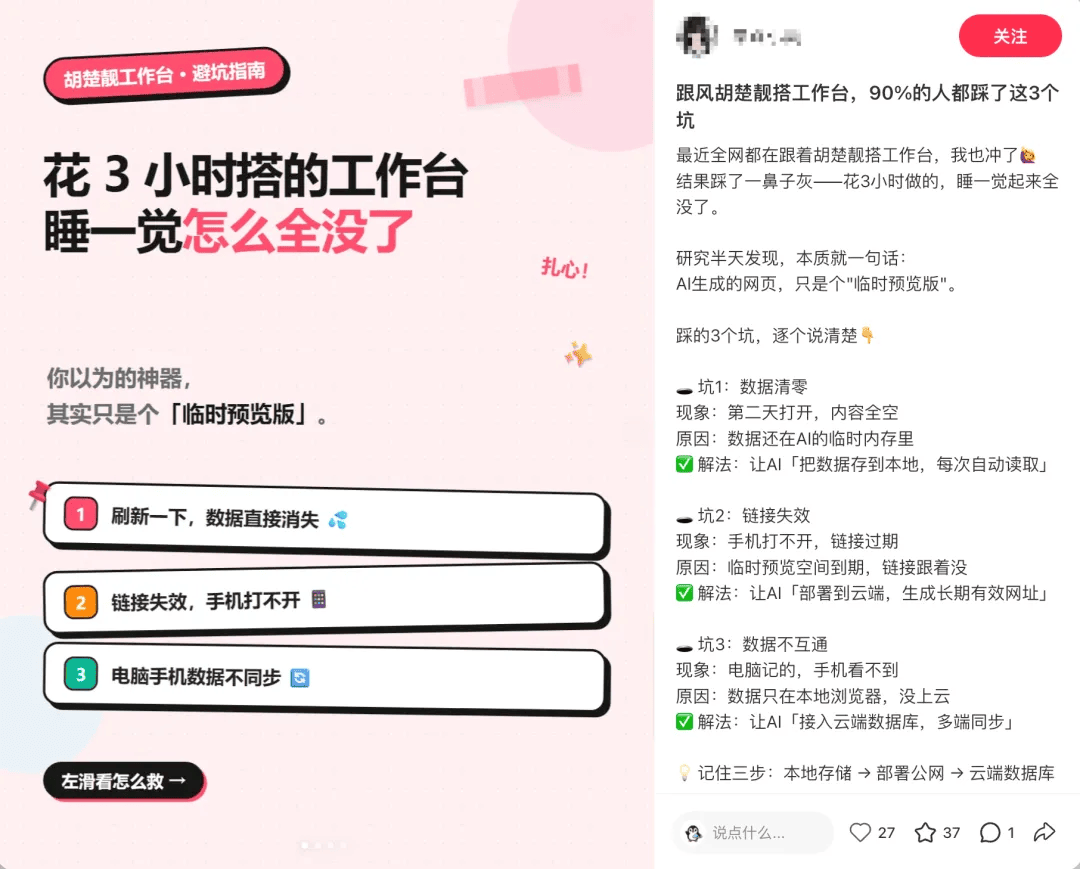
Workbenches grow. The base that felt smooth at the start often can't keep up.
So this post covers two things: first, walking you from 0 to 1 building the workbench on CloudBase, then how to bolt on capabilities that keep it growing (media, permissions, sharing, payments, scheduled jobs, AI...).
1. When do you know it's time to switch bases?
Watch for these four signals. Hit any one of them, and your base needs an upgrade.
Signal 1 — You want images, video, PDFs — not just text
"Can it sync images? I'm making a notebook workbench, adding photo-and-text notes daily… but new notes never sync."
Browser localStorage can't hold images; a few base64-encoded ones blow the quota.
Signal 2 — You want to share it with family or a team, but everyone sees only their own
"Can one account be shared with my daughter? Could we collaborate on one interface from different computers, create family projects, help her with homework, track daily plans…"
Multi-device login on one account is the bare minimum. Real collaboration means "everyone logs in as themselves, shares selected data, keeps their private space." That requires a full identity + permission system.
Signal 3 — You want to send a link to outsiders who can read and write
"The published link can't interact with the data table (internal links can)…"
This is the natural boundary of spreadsheet-style sync solutions: the built-in editor maintains associations for you, but once published as an external link outside the editor, the read/write channel breaks. A cloud database doesn't have this problem — no matter where you open it from, it's the same set of APIs.
Signal 4 — You want to go further: websites, mini programs, online payments, a backend that runs itself
"Hoping for lightweight website / app / mini program features, with online payment support… so a true beginner can build a compliant website and app."
That's full-stack application territory. The workbench is the entry point; to hook up more capabilities later, the base has to carry them.
Hit any one of these, and it's time to upgrade the base.
2. From 0 to 1: build a genuinely usable workbench on CloudBase
No code. Everything runs in WorkBuddy. Follow these 7 steps and you'll end up with a workbench that syncs between desktop and phone, stores images, and keeps data no matter who visits.
What you'll have
- A content-creation workbench (or swap in your own scenario) — with "Today's focus / Topic ideas / Content progress / Publishing calendar / Weekly review"
- Data lives in Tencent CloudBase, auto-synced between local and cloud
- Open the same URL on desktop and phone, see the same thing
- Images and files sync too
What you need
- The WorkBuddy client: chats, connectors, and Skills all live in it
- A Tencent Cloud account: for a free-tier CloudBase environment
- Desktop + phone: that's how we verify cross-device
- Once the environment is created you'll have an environment ID — connectors, deployment checks, and domain binding all use it
Step 1: Generate the workbench
Open WorkBuddy and pick one of three ways to start:
-
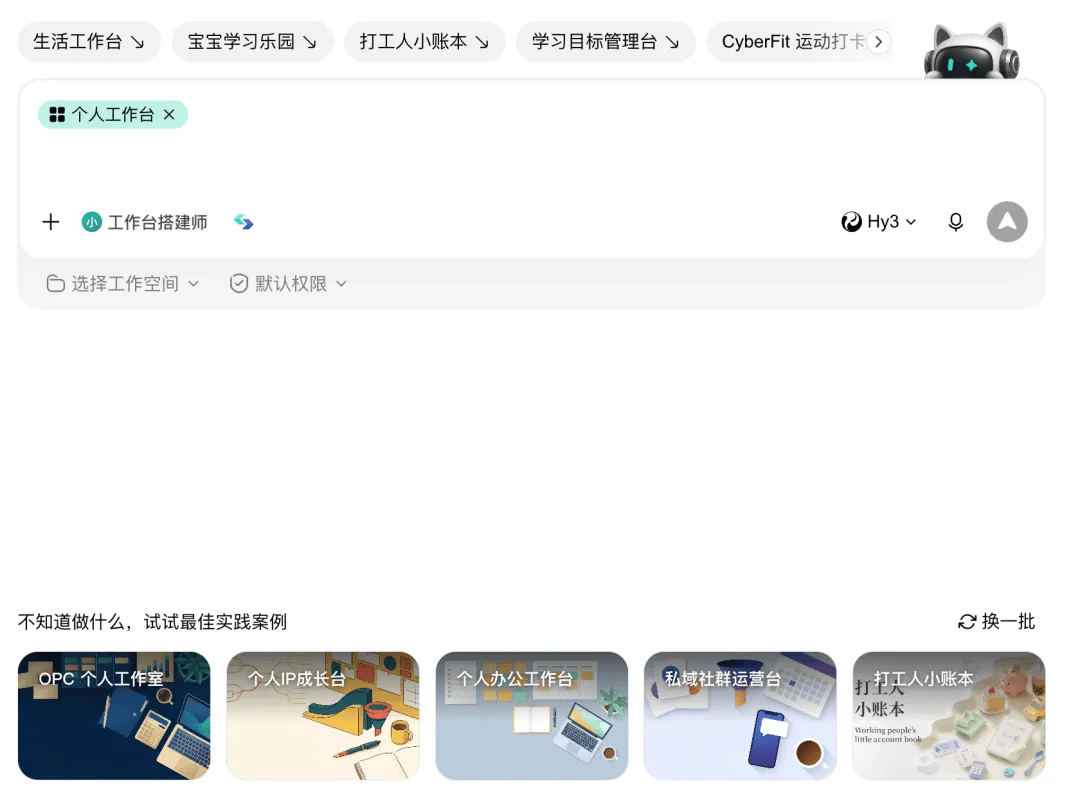
Use a template: below the chat box, "Not sure what to build? Try a best-practice case" — pick the closest one and apply it with the official or open-source prompt
-
Write it yourself: one sentence (goal + modules + constraints)
Build a content-creation workbench with five modules: today's focus, topic ideas, content progress, publishing calendar, weekly review. Start with a locally runnable version; adapt it for mobile.
It won't start writing immediately — it clarifies requirements with you first: scenario / modules / devices / navigation / what shows on the home page / visual style. The clearer this step, the less rework later.
Once requirements line up, hit "Start building" and let it run in the background. A preview appears on the right when done; "Open in external browser" at the top right is easier to look at.
Don't rush to the cloud — click through the local version by hand first:
• Try add / edit / delete / check on every module
• Home page numbers should update with the modules
• Press F12 to switch to the mobile view; screenshot any layout breakage and send it back to WorkBuddy to fix
While you're at it, have WorkBuddy remove the "Reset sample data" button so you never wipe everything by accident. Next: move the data layer from local to cloud.
Step 2: Create a CloudBase environment
CloudBase has a free trial tier. Go to the Tencent CloudBase console:
-
Click "Free trial" — new users get free quota; learning and small-scale use cost essentially nothing
-
Complete "service authorization" on first entry
-
Give the environment a meaningful name (like
growth/rich— logs, deployments, and domain binding all use it to identify you) -
Region defaults to Shanghai
-
Pick the free-trial edition and choose "Document database (NoSQL)". PostgreSQL / MySQL are also supported — choose per your workload.
-
Enter the redemption code and click "Buy now"
Once created, the console shows cloud database, cloud functions, cloud storage, and authentication. Your workbench data lives in this environment.
Step 3: Connect WorkBuddy to CloudBase
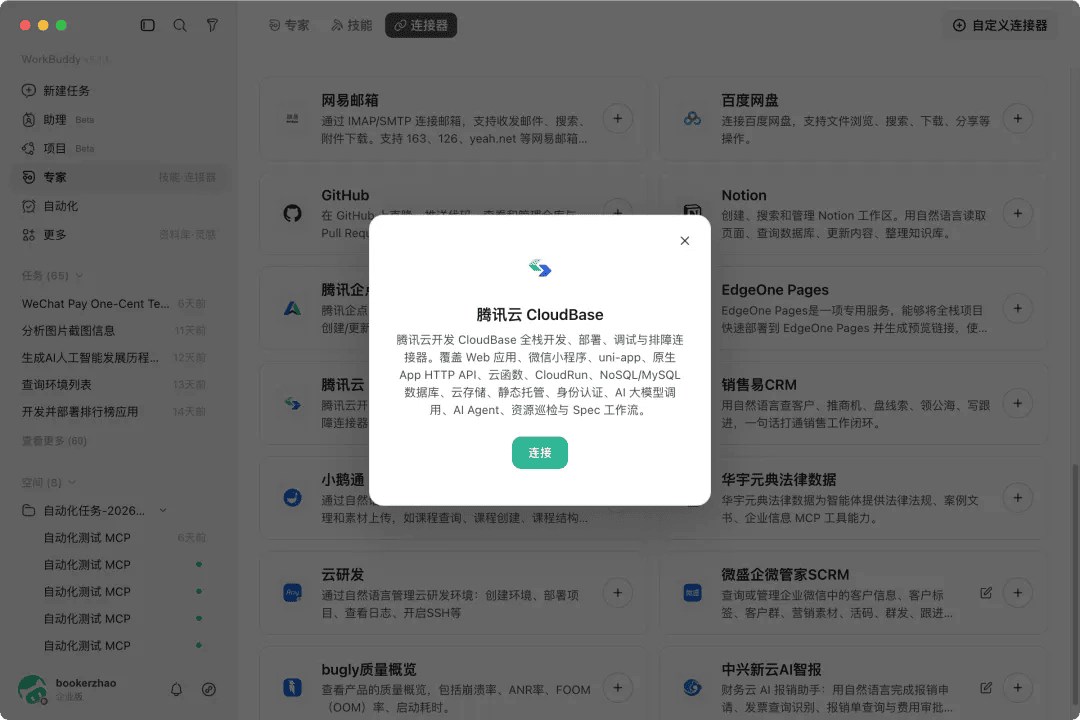
Back in WorkBuddy, open connectors, search "Tencent CloudBase" in the connector manager, and click + to install. Select it and it takes effect in your session.
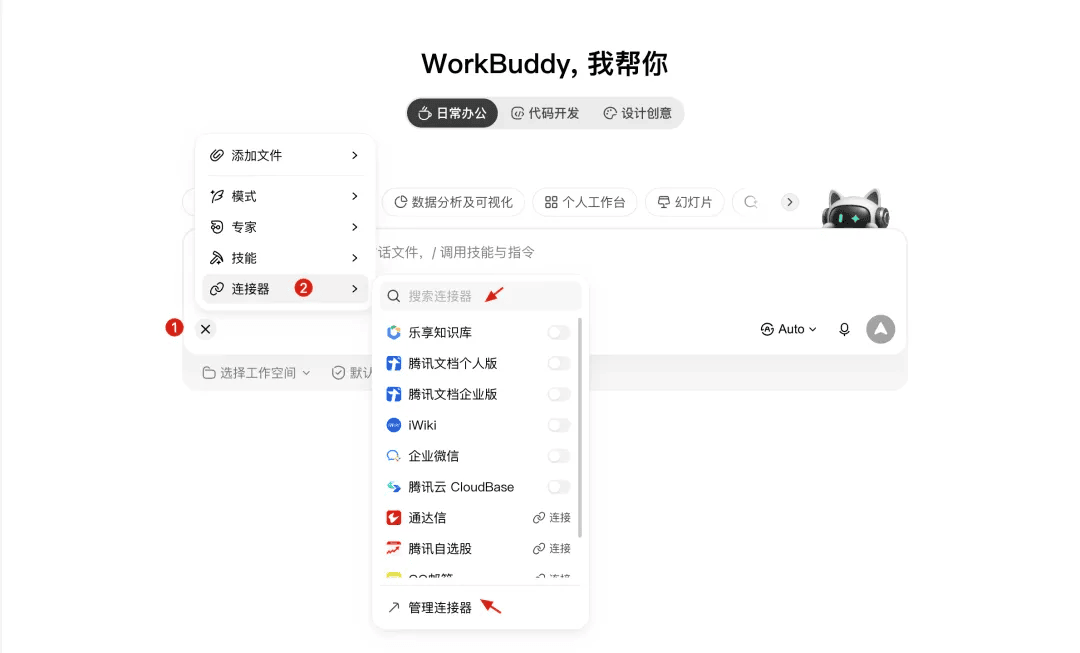
When authorization succeeds, the connector turns green. At this point WorkBuddy can actually read the environment you just created — it has upgraded from "only edits local code" to "can operate cloud resources".
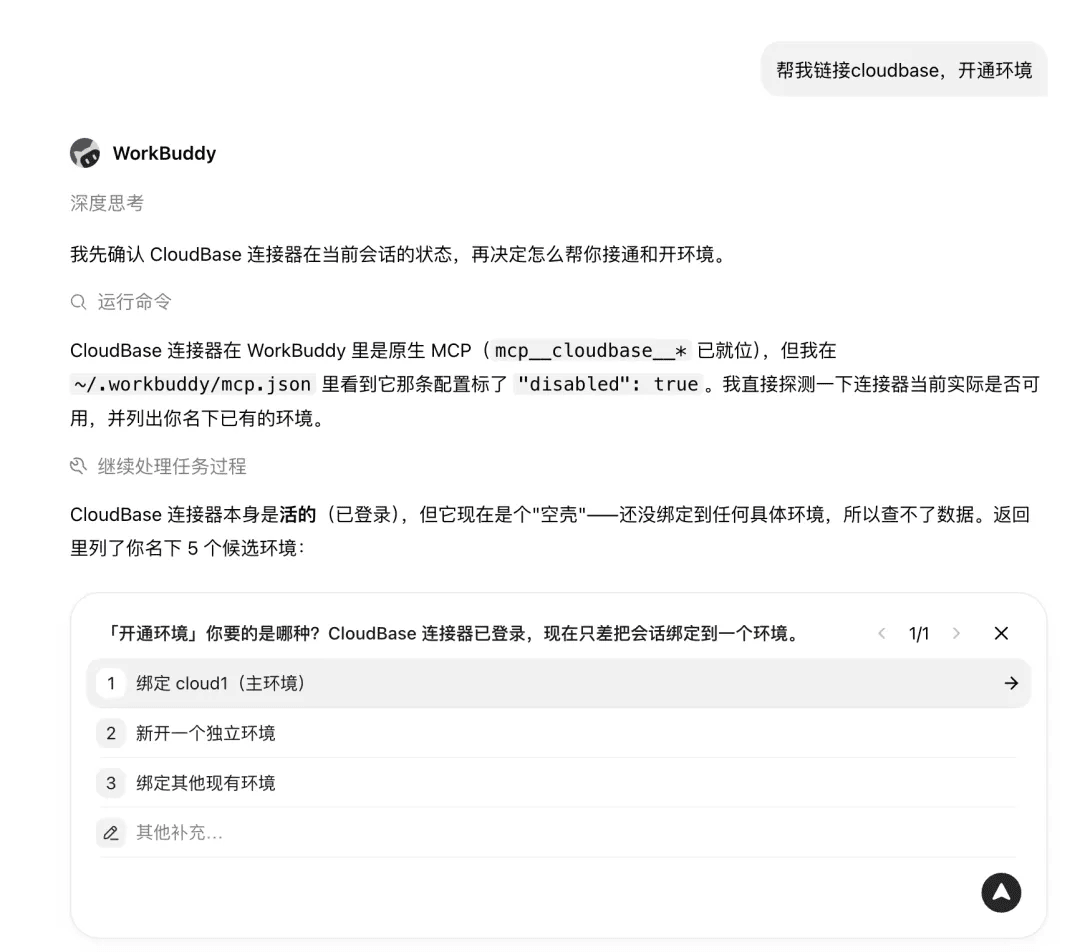
From now on you can ask WorkBuddy in chat to query the database, deploy sites, or manage cloud functions — no need to open the console yourself.
Step 4: Move the data layer to the cloud and publish a preview
Go back to the chat that generated the workbench and just say:
Store the workbench data in CloudBase; I need multi-device sync.
Copy that sentence or use your own words. The core: data to the cloud, multi-device sync.
It will first ask for authorization, then confirm where the data currently lives, which modules and fields exist, which files change, how old data gets backed up, and how to roll back on failure.
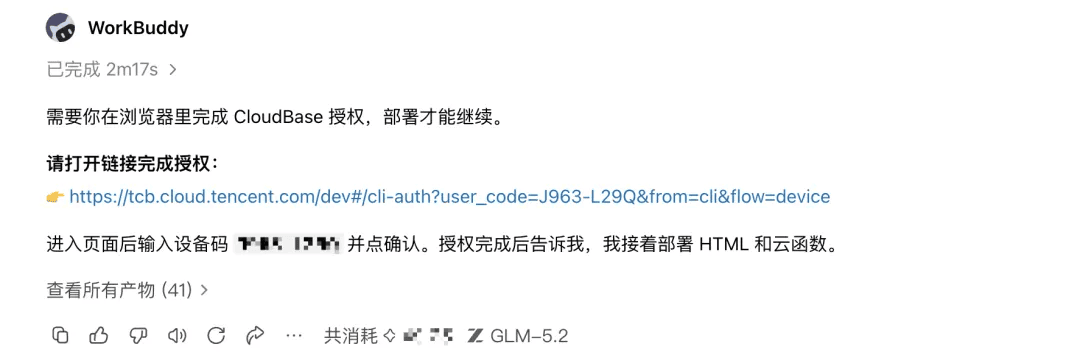
Once the plan is agreed, let it execute: back up local data → create collections in CloudBase → switch reads/writes from local to cloud → deploy an access URL.
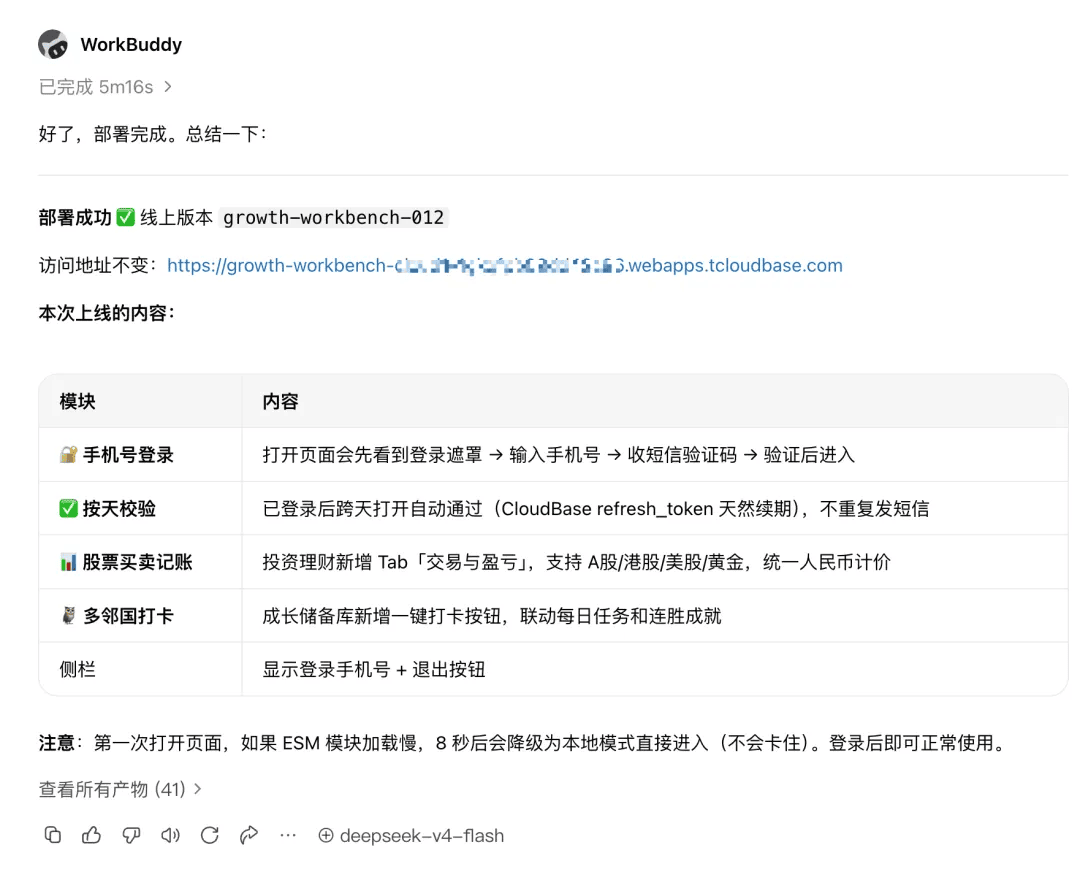
Sync mode: the most robust is "local + cloud auto-sync" — keep a local copy for instant loads, cloud collections as the multi-device source of truth. The document database is schemaless, so adding new fields later needs no migration; writes just sync.
Deployment mode: static hosting, URL like
https://<env-id>.webapps.tcloudbase.com; you can bind a custom domain in the console for something memorable.
-
Open the URL on desktop, add a task, confirm it sticks; open the same URL on your phone — the data is there
-
Add an item on desktop, refresh on phone and it appears; check it off on phone, refresh on desktop and the state syncs
-
Upload an image, refresh on the other end, the image is there
-
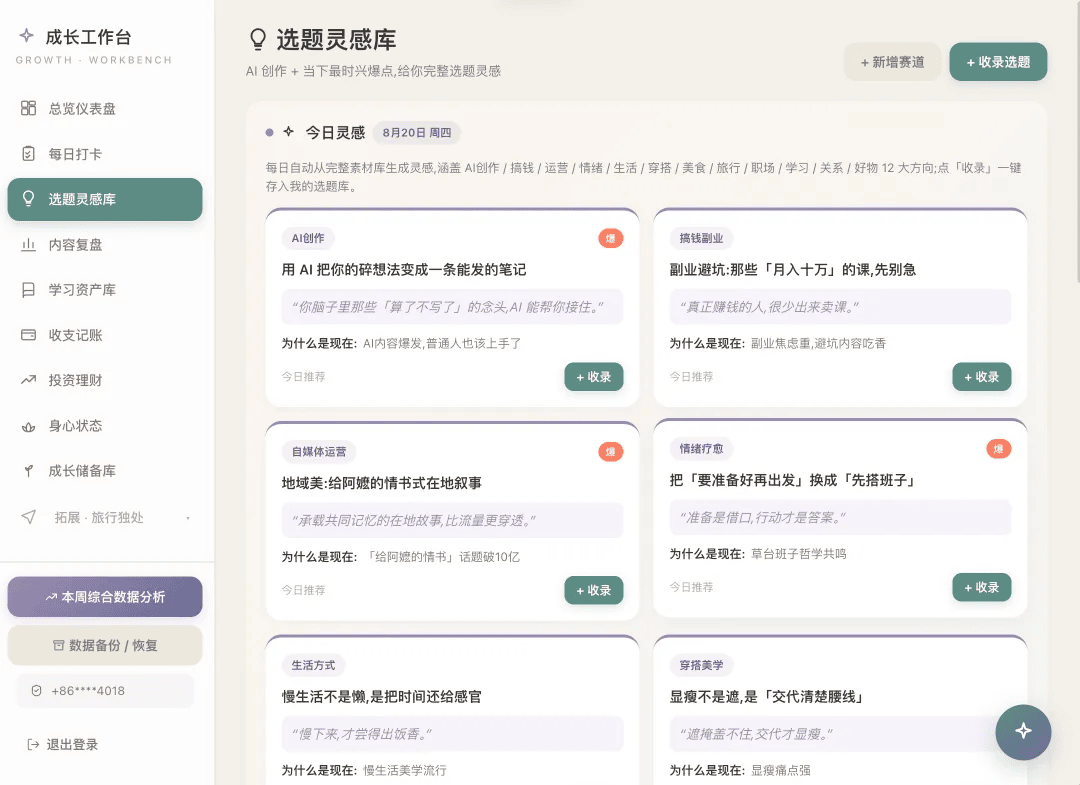
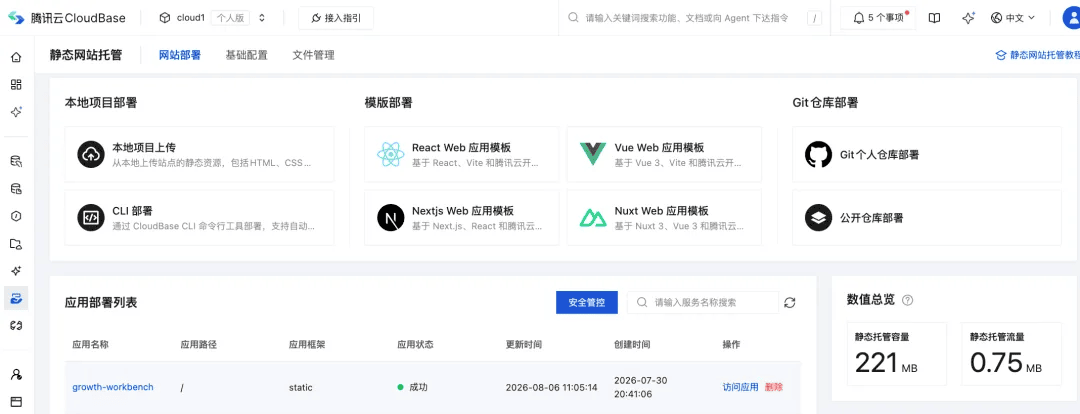
At this point you have a workbench that syncs across devices, stores images, and has working shareable links — the starting point of "actually usable". You can also check the deployed app in the cloud console.
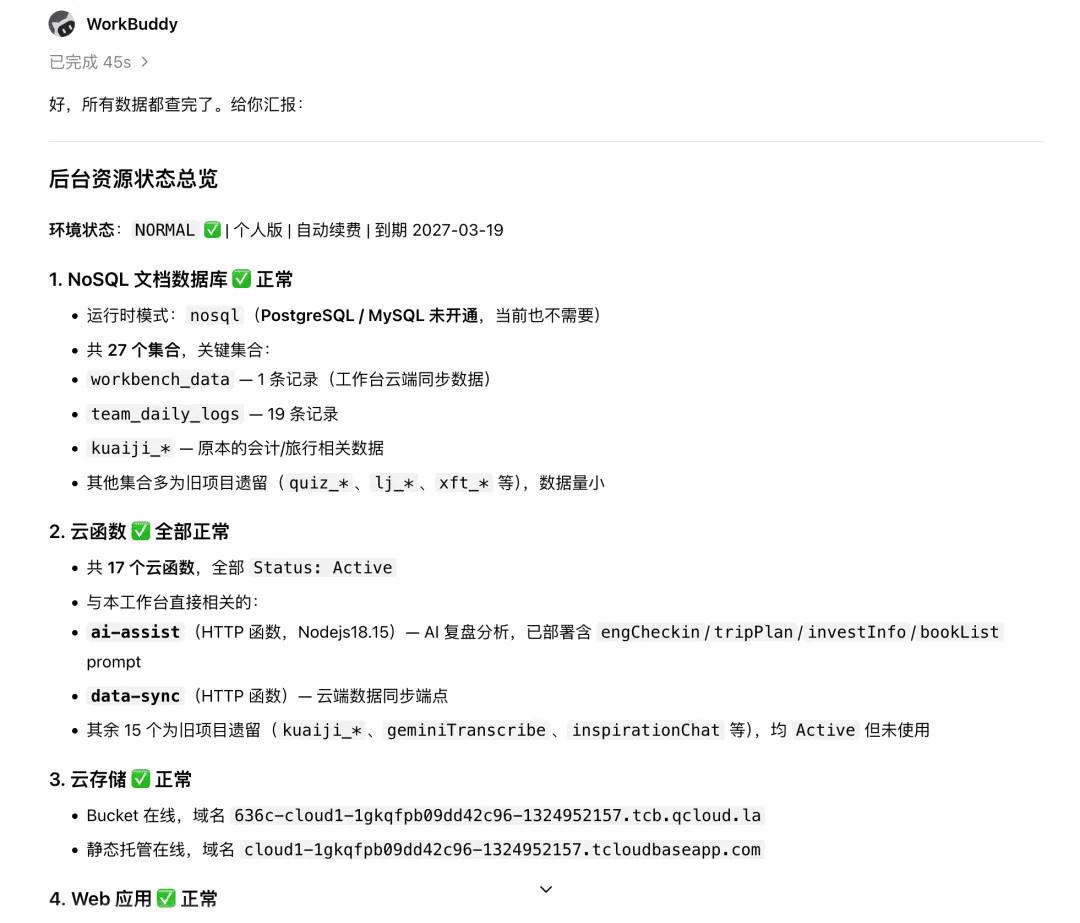
You can also just tell the AI: check whether the backend database is working normally — it will query all your cloud resource usage.
3. Leveling up: four "watershed" capabilities that turn "usable" into "great"
After the deployment above, the workbench is already in the cloud. These next four moves each push it one step closer to "practical".
3.1 Images, video, and big files all sync
Text goes into the database; images and video go to cloud storage; a single record links the two. That's CloudBase's basic setup — you already got image sync along the way in step six. Video follows the same logic; files are just bigger, which makes them even more worth putting in the cloud. Local video stuffed into a project folder uploads slowly and doesn't belong in a code repository.
How video-to-cloud + in-app playback lands, in two parts:
A. Create cloud storage (one time)
- In your environment, under "Cloud storage", create a bucket. A separate bucket for video is recommended — don't mix it with images, so you can control permissions and clean old files independently.
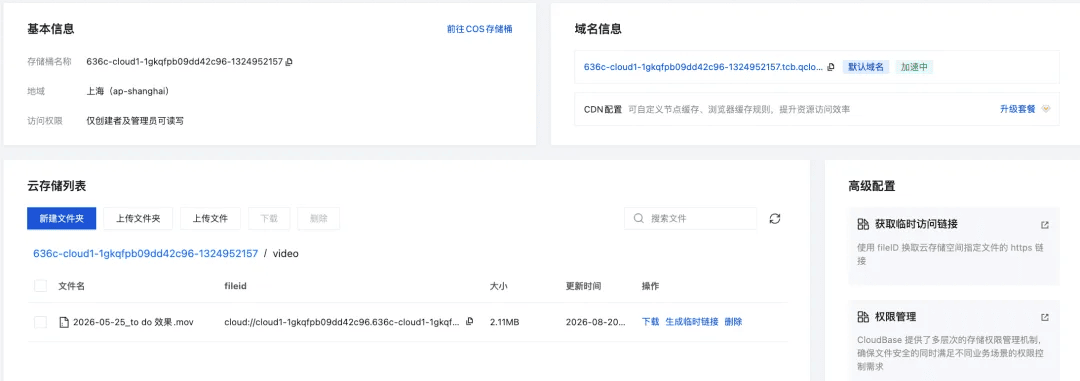
B. Upload video and wire it into the workbench (each new video)
-
With the connector set up, just tell WorkBuddy in chat "upload this video to cloud storage" — no manual console uploading
-
A cloud access URL comes back on success
-
Tell WorkBuddy: "generate a page in the workbench that plays the video from that cloud URL" — it produces a page with a
<video>tag pointing at the cloud URL
The benefit is direct: the project folder stays light, yet video plays on demand. No worrying about browser storage limits.
Images, video, PDFs — any static asset works the same way.
3.2 Tiered permissions: everyone sees only their own while collaborating
This is the core of family and team collaboration. CloudBase natively supports two layers:
Layer 1: role tiers (decides "who gets in, what they can touch")
Have the AI design the full role-and-permission scheme for your system; subdivide by project or team as needed.
Layer 2: row-level permissions (this is what makes "each person sees only their own" work)
Each role can have separate read/write scopes on the same data:
-
me= read/write only rows they created -
all= read/write everyone's rows
A concrete example: the admin gets rw:all + rw:me — can edit everyone's data; a family member gets rw:me — reads and writes only their own, sees nobody else's; an outside guest gets r:all + rw:me — sees the shared info and can edit their own entry.
One workbench, multiple roles collaborating, each seeing their own, admin seeing all. The homework-tutoring scenario in a family lands exactly this way. For web/mini-program code you write yourself: use database security rules and judge "is this row mine" with doc._openid == auth.openid.
Either way, you never build an account system yourself.
3.3 Shareable links: anyone who opens them can read and write
On a CloudBase-deployed site, data and pages are parts of the same application — no matter where it's opened from, reads and writes hit the same APIs.
Layer identity on top and you can do more:

-
Anonymous mode: anyone who opens the link can submit an entry (customer feedback forms, event sign-ups)
-
Write after login: when you need accountability, require phone or WeChat login
-
Login + permissions: after login, roles decide how much is visible
Three levels, switched on demand — no rewriting code.
3.4 From workbench to full-stack app
The workbench is the entry point; on the same CloudBase environment you can also grow:
| What you want | How CloudBase delivers |
|---|---|
| Website | Static hosting + custom domain (done in this tutorial) |
| Mini program | WeChat CloudBase SDK into the same environment, data shared |
| Online payment | Official WeChat Pay APIs, cloud functions as the backend for callbacks |
| Automated backend | Cloud functions + scheduled jobs — e.g. auto weekly review |
| AI capabilities | Cloud functions calling LLMs — add an "AI reviewer" to your workbench |
| Compliance | ICP-filed domain + HTTPS configured in the console |
From workbench to full-stack app there's no cliff — capabilities keep stacking on the same layer of data.
That's the real value of choosing the base wisely: what starts as a workbench grows into a complete product.
Official call for submissions
The workbench keeps growing. Need media, family sharing without interference, links for outsiders to fill in, payments, or turning it into a mini program or app that compounds over time — upgrade with CloudBase in one click.
📮 We're collecting your workbenches on Xiaohongshu
If you've built a workbench on CloudBase — whether it just started running (your 0-to-1) or it's already wired up with cloud functions, storage, permissions, scheduled jobs, AI assistants, payments… we'd love your submission.
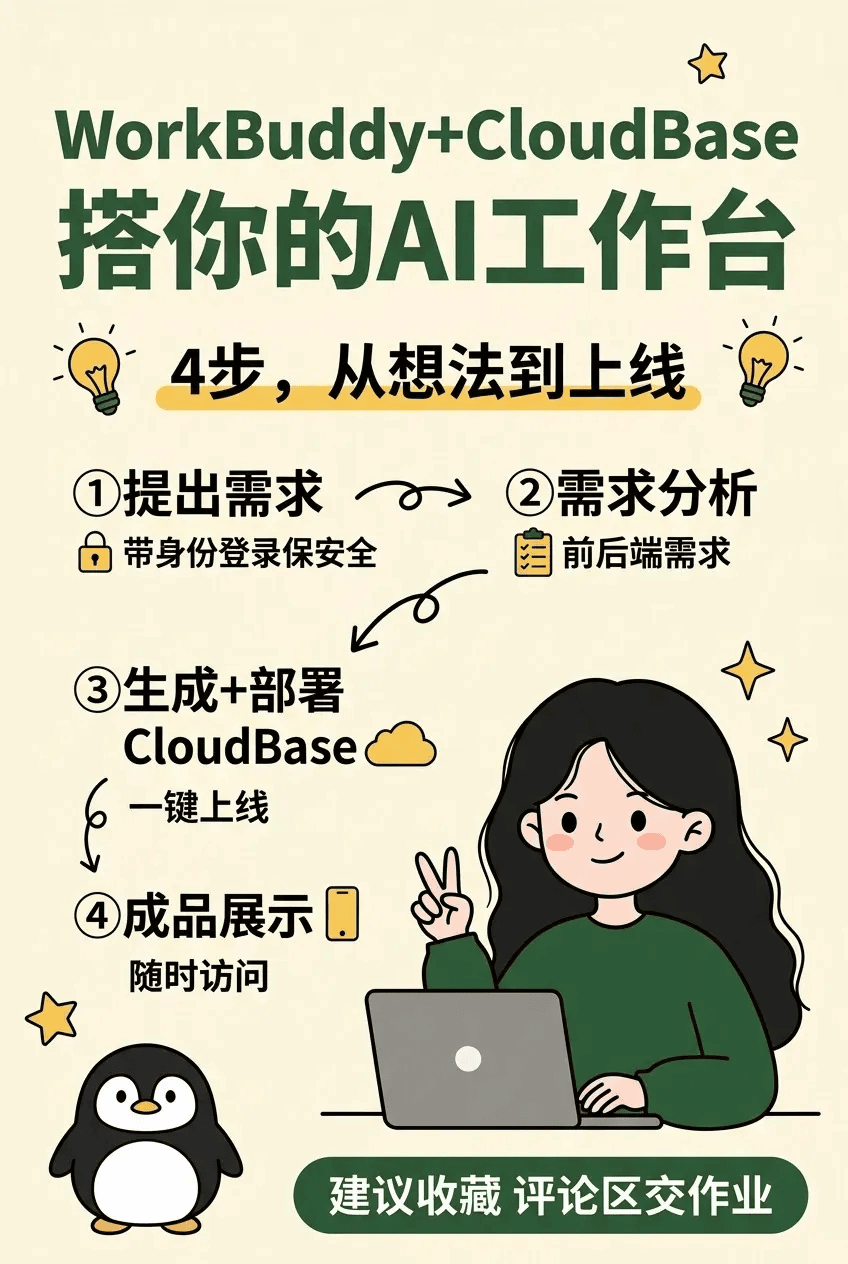
We want to see more real user cases:
-
What problem your workbench solves
-
Which CloudBase skills you used (functions / storage / permissions / scheduled jobs / AI / payments…)
-
Pitfalls you hit and how you got around them
-
What it looks like now
How to participate:
-
Search and follow "CloudBase 和它的朋友们" on Xiaohongshu
-
Post a note about your workbench with #CloudBase and @ the official account, or drop a screenshot under the official tutorial — you'll receive resource credits
-
We'll also pick cases to feature on official channels
Feel free to send over pitfalls and questions too — future case studies may start from your sharing. Forward this to friends who are also figuring out how to land a "workbench" 🐧